Pages - Menu

Thursday, March 28, 2013

Fan Brush Nail Art

  1. Start with as many shades as you'd like.I chose three shades.
  2. Apply your base coat.
  3. Then using the very tips of your nail brush dip into your first color.Then fan across your nails from left to right.
  4. Then fan your next shade on top.Repeat the process till you get the desired effect.Viola♥Fan Brush nail art.


Monday, March 25, 2013

Colorful French Mani

  1. Start with a light base coat.Shown here is a Sally Hansen ,not sure what the color is.It's like a pale peach.
  2. Then apply your black on the tips.Allow to dry completely.
  3. Then if you can you can either free hand your colors above the black or use your stripes again covering up the black and placing one above.I used a small art deco brush for the colors.
  4. Viola♥Colorful french mani


Friday, March 22, 2013

Saran Wrap Nails

  1. For Saran Wrap Nails you'll need a base coat(white),and I chose two other colors.I also applied a little bit of chap stick around the nail for easier cleanup.
  2. Drop your colors onto your saran wrap.
  3. Then fold your saran wrap in half,and push down onto your colors.Don't mix too much or it will end up being one color.
  4. Then peel apart gently.
  5. Apply over your nail pulling the sides of the saran wrap downwards.
  6. Pull off gently,and you'll have lots of cleanup.Viola♥Saran Wrap Nails


Wednesday, March 20, 2013

Black & Yellow Stripes

  1. Start with your black & yellow base coat.
  2. Middle finger yellow,then apply your stripes across the nail connecting them together on one side of the nail.If you connect them together it makes it much easier to pull them off at once,however remove slowly.
  3. Then apply a black top coat.
  4. Then repeat on pointer finger .
  5. Then apply a yellow top coat.Viola♥Black & Yellow Stripes


Monday, March 18, 2013

Colorful Sqiggles

  1. First start off with some bright colors.
  2. Then using the same colors using your art deco brush apply the same colors to different nails.
  3. Then using medical tape or scotch tape,tape it to some paper making sure to leave an over hang so it's easier to peel off of the paper.
  4. Using paper shaper scissors cut some sqiggly lines.Then peel off carefully.
  5. Then apply over the nail pressing firmly.
  6. Apply your top coat.Any color will do.Viola♥Squiggly nail art.


Friday, March 15, 2013

Colorful Squares

  1. Choose a light colored base coat.I chose NYC"Skyline Blue",and choose bright colors for your squares.I would suggest applying your base coat the night before or hours before you apply your nail tape.
  2. Using your nail striping apply horizontally,then across vertically.Some squares I made bigger.
  3. Then using your dotting tool or a toothpick apply colors carefully.Remove striping gently one at a time.♥Viola Colorful Squares


Wednesday, March 13, 2013

Tri Colored Tribal

Here's another version of Tribal Nails
  1. I chose three colors,yellow pink & white
  2. Then paint in rows,and since I'm so impatient about letting them dry I apply one right after another,and don't worry if they blend together a little.
  3. Then create your horizontal lines using your art deco nail stripper in black.
  4. Then create V's
  5. Then your lines.
  6. Then your dots inside of the triangles.Viola♥Tri colored Tribal Nails.


Tuesday, March 12, 2013

Black & White Checkered

  1. Start with a white base coat.
  2. Then using your Art Deco nail striping brush make vertical lines.
  3. Then horizontal lines.
  4. Then fill in with your black Art Deco brush.Viola♥Black & White Checkered.


Monday, March 11, 2013

Fetish Swatches

So here's a polish I've never heard of "Fetish"run for cover,and of course I threw out the package to this polish before I could get the name of the shade.I love this shade,it has a bit of a golden shimmer and a little bit of a greenish tint to it.The best part is I found these at the dollar store.Who Knew?


Again I don't have the shade for this one either,however it's kinda like a deep,dark brown with specks of golden glitter.Great shine,and didn't have to apply a clear coat.One coat covered kind of weird,and not sure if I would like it,however after applying 2 coats the shade is awesome.Love it!


Saturday, March 9, 2013

Nail Striping Design

  1. First start off  with a base coat.I chose Spoiled "Distant Memory".Then apply a clear coat to only the base coat.
  2. Then place your striping on as shown.I also doubled up my striping to make the stripes thicker.
  3. Then apply the top coat over the stripes.I applied 2 heavy coats making sure to cover the stripes completely.If you'd like the indents bigger apply more than 2 coats.Then gently remove stripping.Viola♥Nail Striping Design.


Friday, March 8, 2013

Three more L.A.Colors Swatches

So I went out and purchased three more L.A.colors so here they are.All of these I did not have to apply a clear coat.
 Static Electricity
This color tended to be a bit runny compared to some other shades,however it covered with 2 heavy coats.Awesome shade.


Cactus
I absolutely love the shade of this one.It's kinda in between a shimmery goldish/brown with a lots of shimmer You really only need one coat with this one,however I applied two.
Love it♥


Current
This one is an awesome light shade of green.Covers nicely in 2 coats.Three coats will cover even better,however I prefer it to be a bit sheer.Love it♥


Thursday, March 7, 2013

Corset Nail Design

  1. First start off applying your 2 color choices.I chose L.A.Colors Circuits(black) & Spoiled(My Button Fell Off)which is a pale shade of pink almost white.
  2. Then apply a strip of your lighter color down the middle
  3. Then with a dotting tool place dots on the outer edges of the strip.
  4. Then connect the dots creating X's with a black striping brush.Viola♥Corset Nails


Wednesday, March 6, 2013

Yellow & Crackle Animal Print

  1. Start with a base coat.I chose rue beaute' in yellow
  2. Then apply a strip of white crackle down the middle.The white doesn't show as good so black crackle would most likely have a better crackling effect.
  3. Then using your art deco nail stripper in black,make your stripes on the sides.
  4. Then I applied a tad bit orange around the stripes.
  5. Then silver glitter over the crackle.Viola♥

Wow a little too much light!


Monday, March 4, 2013

Peacock Nails

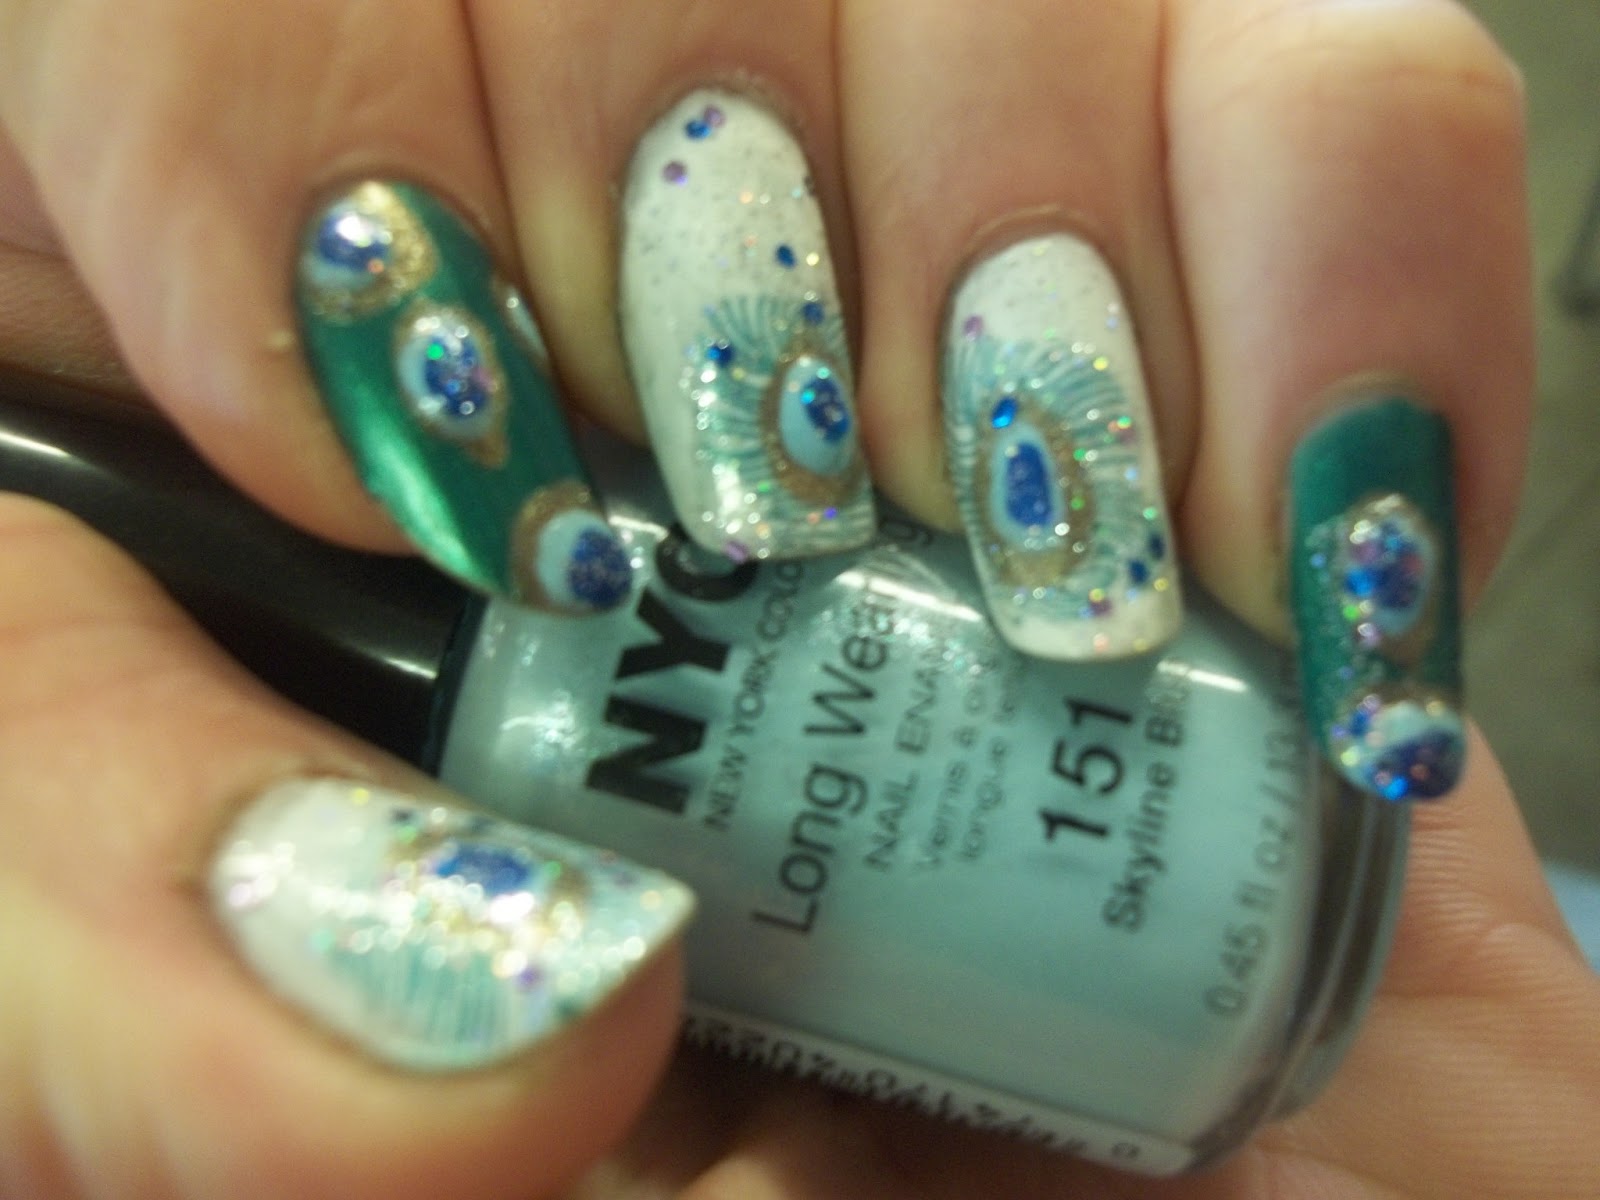
So this is my first attempt at Peacock Nails so please no laughing!This is one nail design that I'm definitely not good at.
In this pic NYC Skyline Blue
I love this shade from Wet n Wild "Caribbean Frost"Oh and I did cheat just a little.I have a feather nail stamper that I used.
I'm not sure,but I believe I need a new camera because most of my pics either come out too dark or too light and/or blurry.It's like I snapped them in a cave or my closet.If anybody could let me know what type of camera they use or what settings are the best please comment.Thanks ;-] and by the way I use a Kodak AF 14 mega pixels.
Here's a different version I tried and failed miserably 
I also added a little bit of green because I thought it was just too plain.
and this one I liked the best