Pages - Menu

Showing posts with label Nail Art. Show all posts

Saturday, October 12, 2013

Creative Nail Design Using Nail stickers

Here's a cool idea for your nail stickers if you don't want to apply the whole sticker.
Cut them into stripes the size of stripping tape and apply.Then apply a top clear coat.
Cool idea right!!
How cute is this


Here's another style of stickers I applied
Just cut them into thin slices.
L.A.color's-Deluxe
L.A.Colors-Dizzy(pinky)
and here's another design using Black & White checkers

Revlon-Drop Dead Gorgeous
Just cut them into whatever size you want & stick!


Friday, May 31, 2013

Black & White Design with Polka Dots

  1. Start off with a sheer base.
  2. Then tape off the tips of your nails,then painting every other nail tip either black or white.
  3. Then using your dotting tools place white dots on your black and black dots on your white.


Just Some More Nail Designs

  1. First start off with your base coat.I chose Revlon(Black with Envy),white polish,silver art deco,dotting tool & tape.
  2. Tape off your finger as shown.
  3. Place dots overlapping your tape creating a straight edge.
  4. Apply your silver art deco on top of your dots.Remove tape.
  5. Viola♥


Monday, March 18, 2013

Colorful Sqiggles

  1. First start off with some bright colors.
  2. Then using the same colors using your art deco brush apply the same colors to different nails.
  3. Then using medical tape or scotch tape,tape it to some paper making sure to leave an over hang so it's easier to peel off of the paper.
  4. Using paper shaper scissors cut some sqiggly lines.Then peel off carefully.
  5. Then apply over the nail pressing firmly.
  6. Apply your top coat.Any color will do.Viola♥Squiggly nail art.


Friday, March 15, 2013

Colorful Squares

  1. Choose a light colored base coat.I chose NYC"Skyline Blue",and choose bright colors for your squares.I would suggest applying your base coat the night before or hours before you apply your nail tape.
  2. Using your nail striping apply horizontally,then across vertically.Some squares I made bigger.
  3. Then using your dotting tool or a toothpick apply colors carefully.Remove striping gently one at a time.♥Viola Colorful Squares


Saturday, March 9, 2013

Nail Striping Design

  1. First start off  with a base coat.I chose Spoiled "Distant Memory".Then apply a clear coat to only the base coat.
  2. Then place your striping on as shown.I also doubled up my striping to make the stripes thicker.
  3. Then apply the top coat over the stripes.I applied 2 heavy coats making sure to cover the stripes completely.If you'd like the indents bigger apply more than 2 coats.Then gently remove stripping.Viola♥Nail Striping Design.


Thursday, March 7, 2013

Corset Nail Design

  1. First start off applying your 2 color choices.I chose L.A.Colors Circuits(black) & Spoiled(My Button Fell Off)which is a pale shade of pink almost white.
  2. Then apply a strip of your lighter color down the middle
  3. Then with a dotting tool place dots on the outer edges of the strip.
  4. Then connect the dots creating X's with a black striping brush.Viola♥Corset Nails


Thursday, February 14, 2013

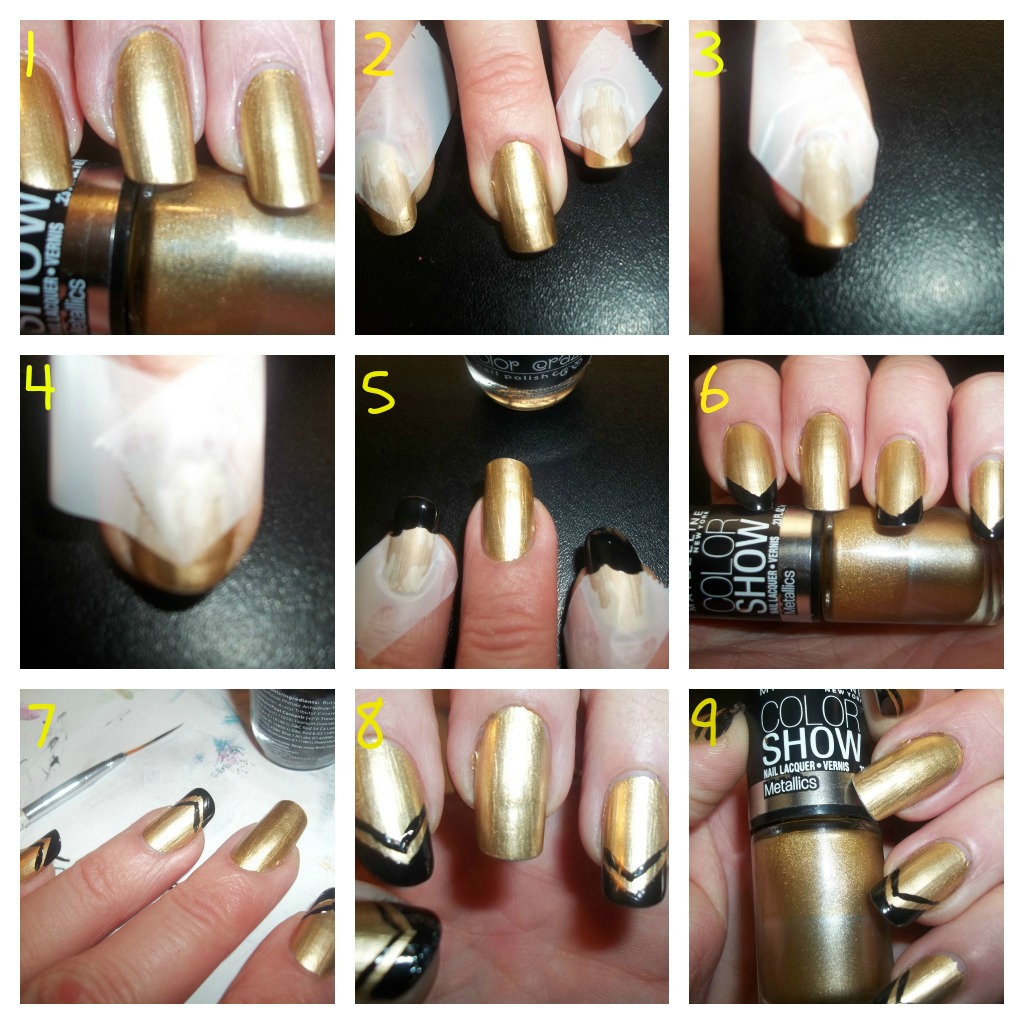
Gold Bold Nail Design

  1. First choose your base.I chose Maybelline Color Show "Gold Bold"metallics which covers in one coat,love the color.
  2. Then tape off like shown in 2,3,& 4 for your V's
  3. Then apply your black.
  4. Gently peel off your tape.
  5. Then with a long,thin nail brush free hand your stripes or lines.
  6. Viola♥


Tuesday, February 12, 2013

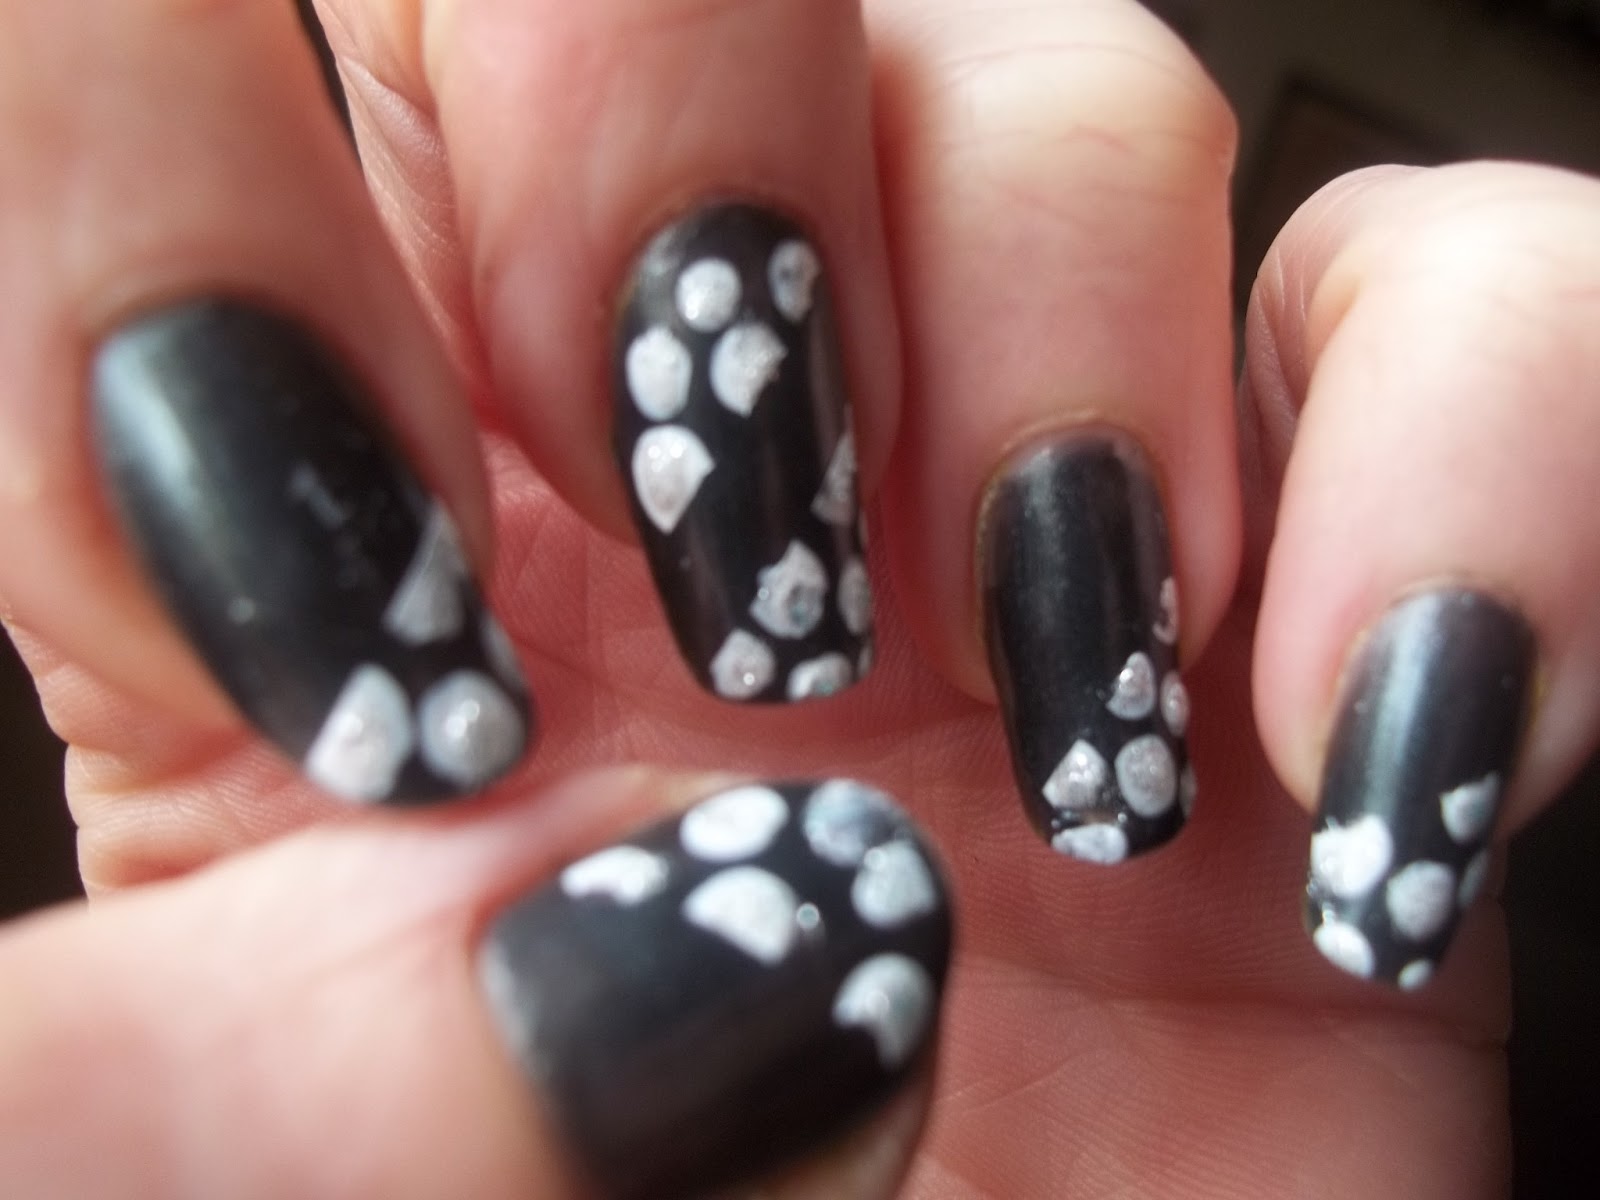
Black & Silver Crown Design

  1. I chose L.A.Colors black(Circuits) & Silver(Live)and you'll need a dotting tool.You don't have to choose these colors.I thought these 2 colors would go nicely together.
  2. Then apply your base.I chose silver.Let it dry completely for awhile.Otherwise the tape will pull off your base color.Then tape off your nail like shown.
  3. Apply your Black.
  4. Gently peel off the tape.
  5. Take your dotting tool and place a few dots of silver onto your black.Make sure to connect the dots to the silver.
  6. Then take your black and do the same on the silver.Viola♥Kinda resembles a crown


Friday, February 8, 2013

A little nail art

  1. First I started off with a light blue & white.
  2. Paint your middle finger & pinkie light blue.Or any two colors you'd like.I chose lighter colors since I am using black on top.
  3. You'll need your stamper and a long thin nail brush.
  4. This is stamper #SH23.This stamp I applied to my thumb & index finger.
  5. Practice on paper creating your tiger stripes with your nail brush.
  6. I also free handed the tiger stripes and the little squares&design on my pointer finger in #8
  7. Then fill in the areas with the darker blue.I chose Milani Mint Candy.Viola♥


Thursday, January 31, 2013

How to Create V's on Your Nails

  1. First pick your choice of colors.I chose Milani "Mint Candy" & NYC "Classic Coral"
  2. Then take a small piece of tape and make a V on the tip of every nail.
  3. Then apply whatever color you'd like to each finger.Then remove the tape.
  4. Then carefully use a small nail brush or the polish brush to fill in the V area with the other color.Viola ♥


Wednesday, January 30, 2013

How to make hearts

I always wondered how to create hearts on your nails.Try using your dotting tool or a small nail brush.As you can see mine are not perfect,some turned out better than others,however if you can make 2 dots on your nails next to each other your good to go.Then connect and pull down the polish to create a heart.Plus it doesn't hurt to have a steady hand.I would suggest practicing on paper first.Viola hearts♥♥


Tuesday, January 29, 2013

Tipped &Tiger Stripes

Here's another great shade from Milani nail lacquer "Tip Toe Pink"